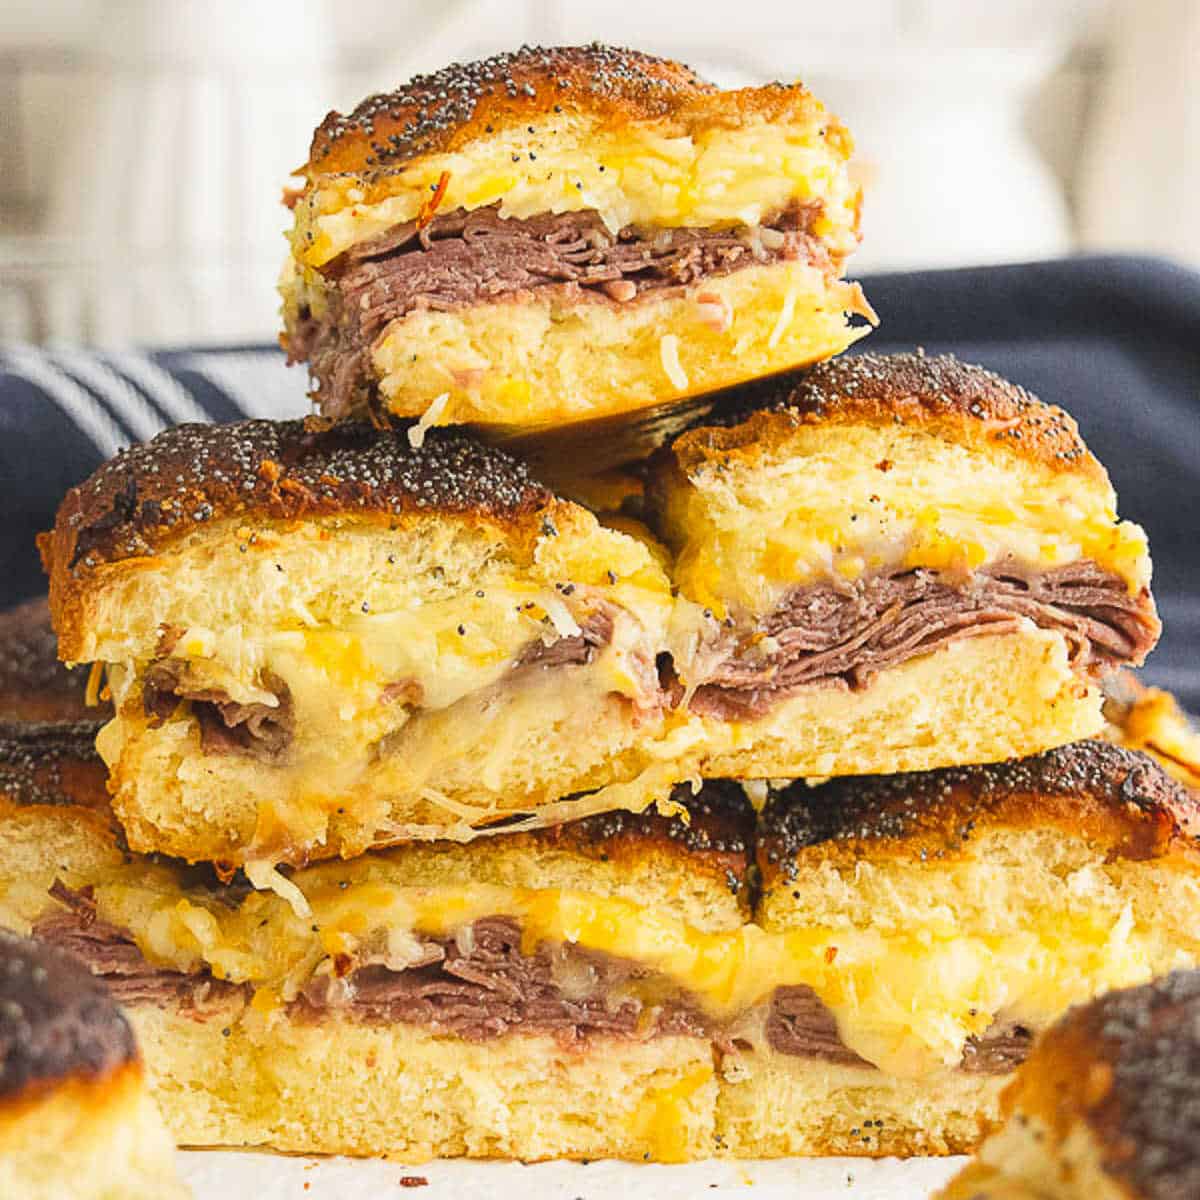
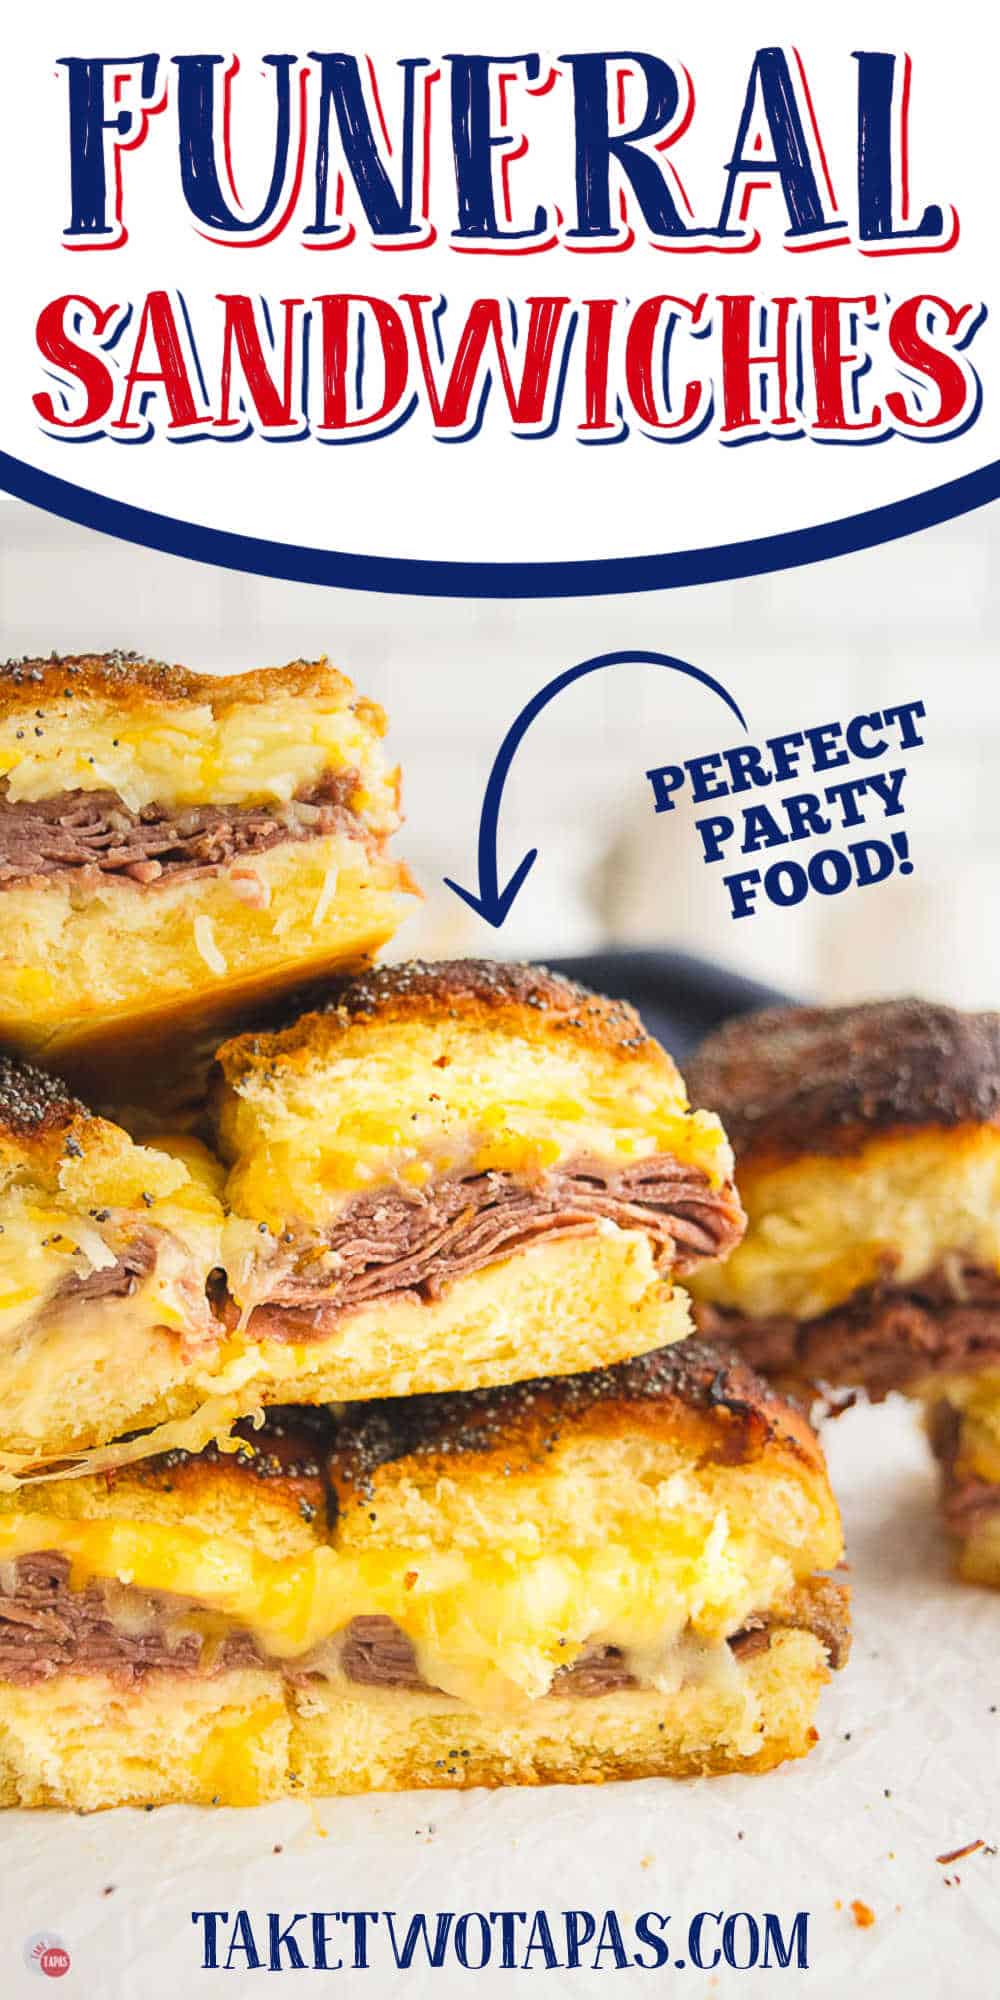
Funeral Sandwiches
Roast Beef Sliders, also known as Funeral Sandwiches, are baked roast beef and cheese sandwiches that feed a crowd at every occasion!
I know this is a strange name for a recipe, for sure, but it’s a Southern Tradition! Much like every wonderful recipe in the south, simple ingredients come together to make a delicious dish.
When I told my mother-in-law, Judy, that I was working on some new recipes for sliders, she told me about these sandwiches that she makes called “Funeral Sandwiches.”
She calls them the best sandwiches she ever tried. I don’t really think much about funeral foods in general, but I do love me some finger foods!
I don’t care what they’re called. Don’t you love something you can prep the night before?!?!
More Slider Recipes
- Sliders Roundup – 16 easy slider variations
- Philly Cheesesteak Sliders – Peppers, onions, melted cheese
- Club Sliders – Triple-decker with Swiss, turkey
- Hawaiian Pizza Sliders – Sweet pineapple and ham buns
This post may contain affiliate links. As an Amazon Associate, I earn from qualifying purchases at no additional cost to you. Read my disclosure policy.
See recipe card for complete information on ingredients and their quantities.
Ingredient Notes
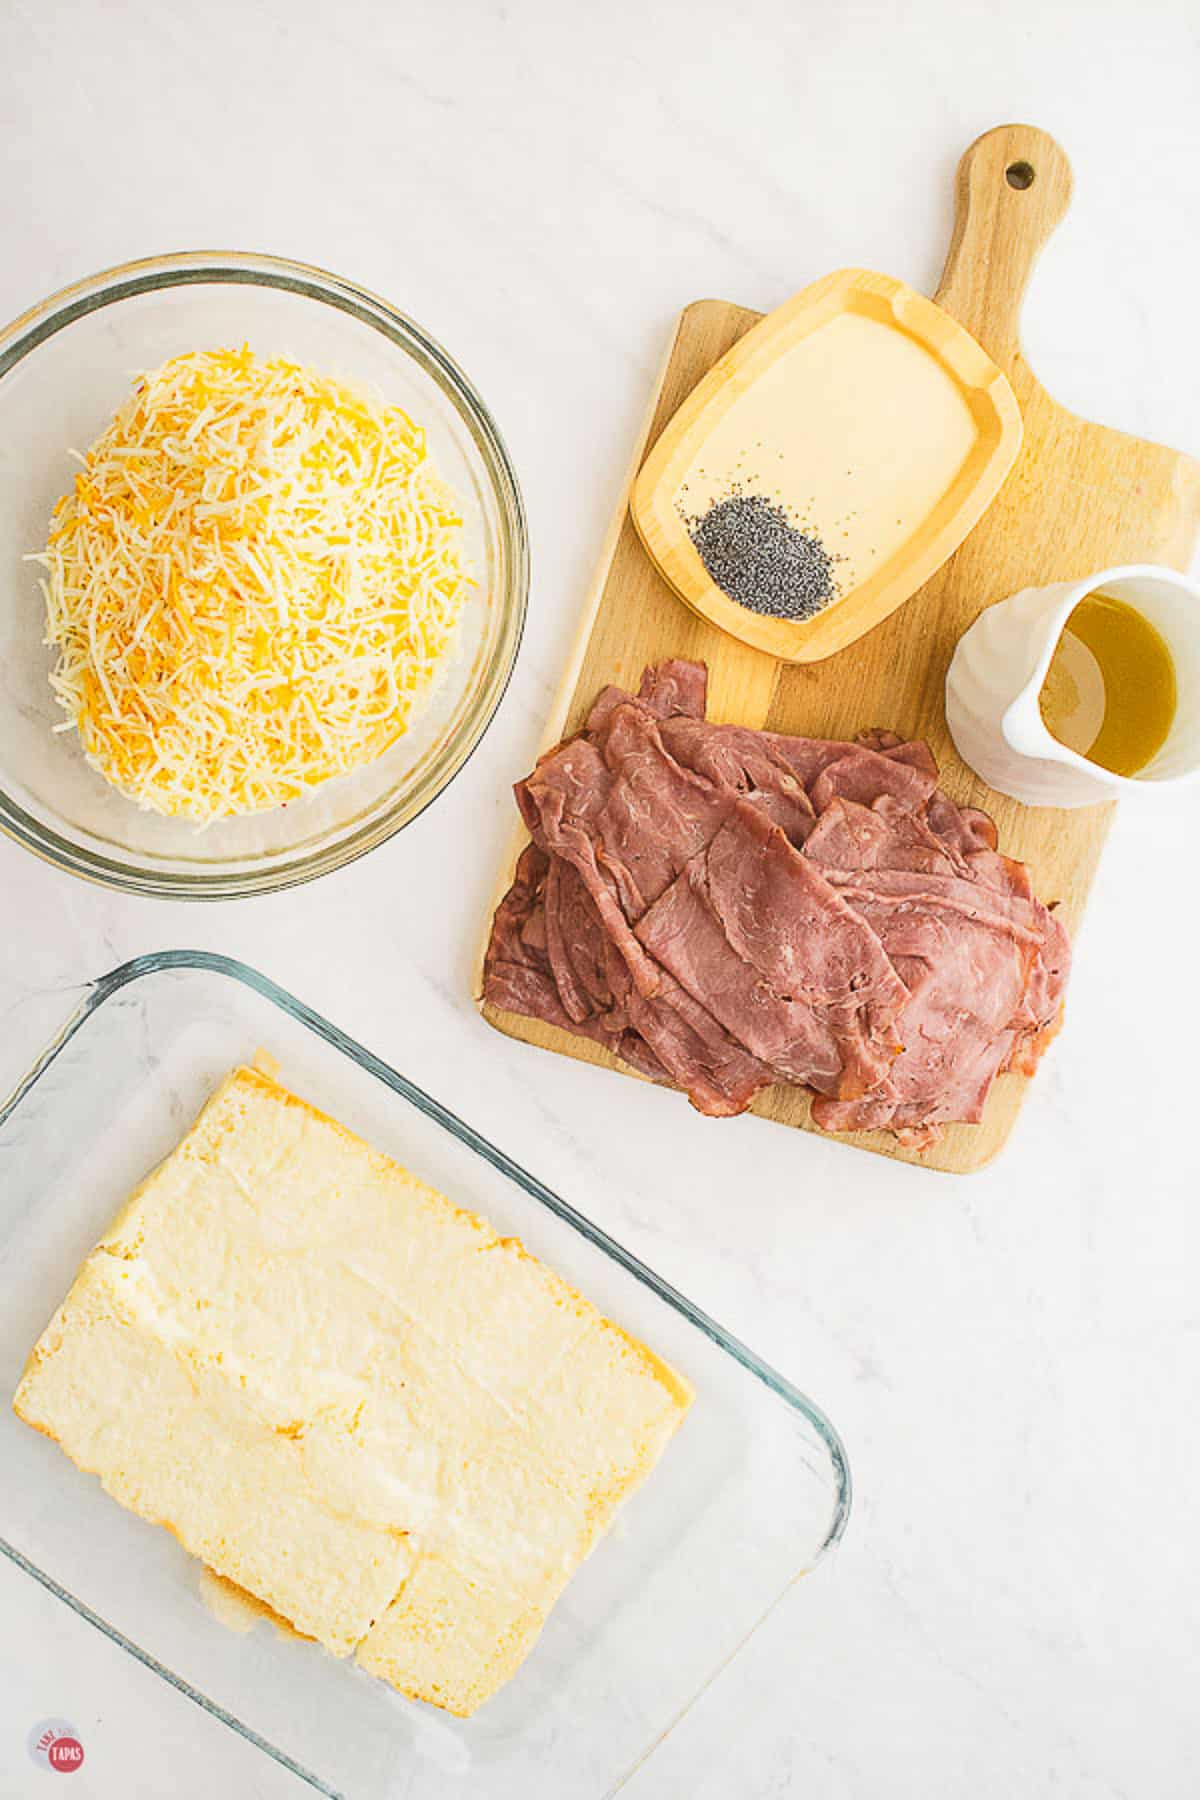
- Roast Beef – Have the deli slice it thin so it’s easy to bite into.
- Cheese – I use a trio of Mozzarella, Pepper Jack, and a Cheese Blend.
- Marinade – A delicious blend of melted butter, Worcestershire sauce, garlic powder, dried mustard, and onion powder.
- Horseradish Sauce – I like a prepared horseradish sauce you can find in the deli section of the grocery store.
- Slider Buns / Rolls – Sweet rolls (like Hawaiian Dinner Rolls) are my bread of choice but a good potato roll will work just as well.
The sliders are marinated in a tangy and slightly smoky sauce overnight so I start with a bread that can handle the marinade and not be a party pooper by getting too soggy.
For more insider tips, tricks, and a behind the scenes look, follow me on Pinterest, Facebook, Instagram, & X.
How to make Funeral Sandwiches
First: Cut all your rolls in half and place the bottoms in a 9X13 baking dish. Add a smear of horseradish sauce.
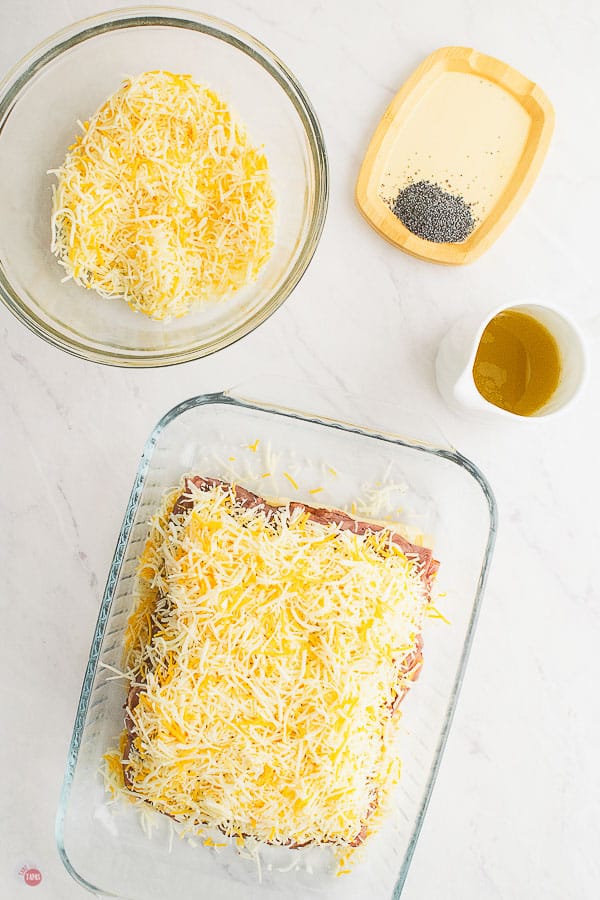
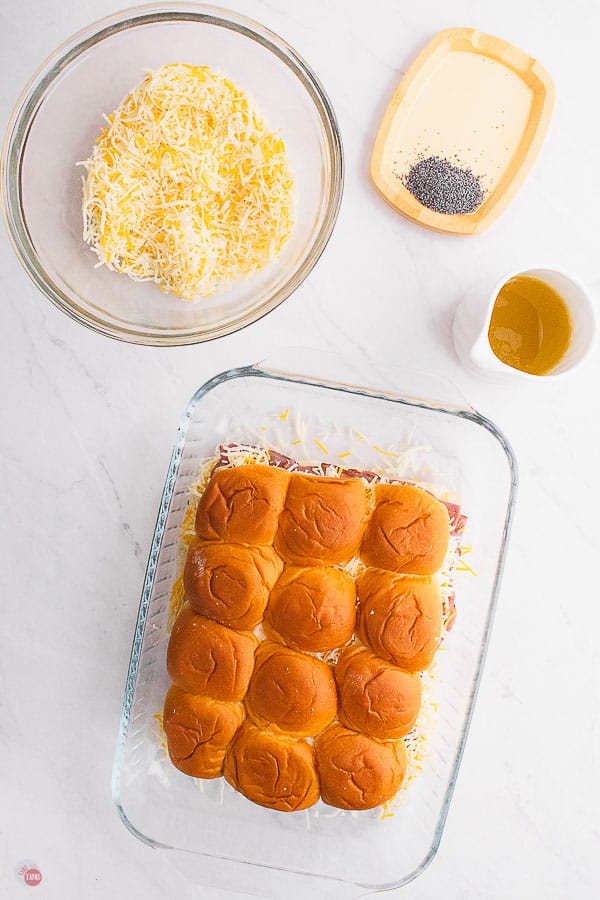
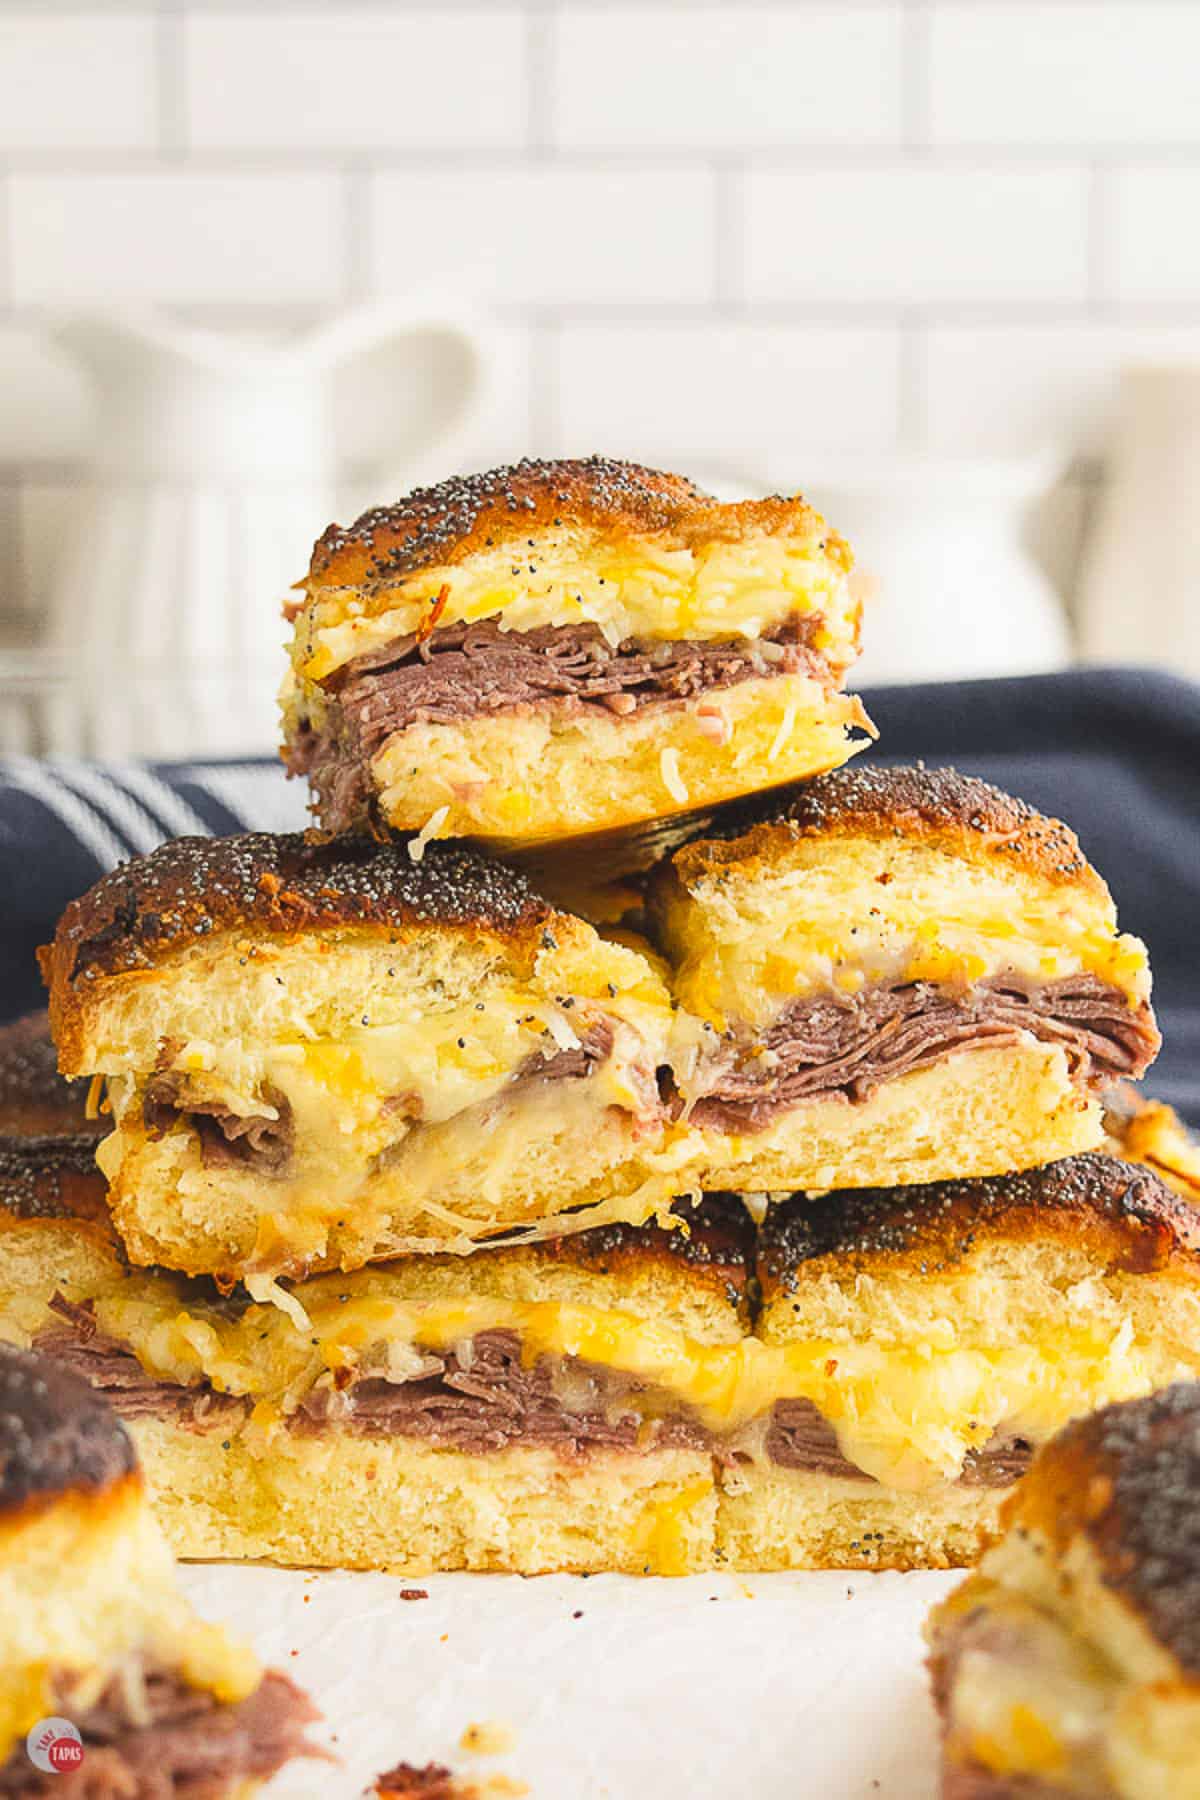
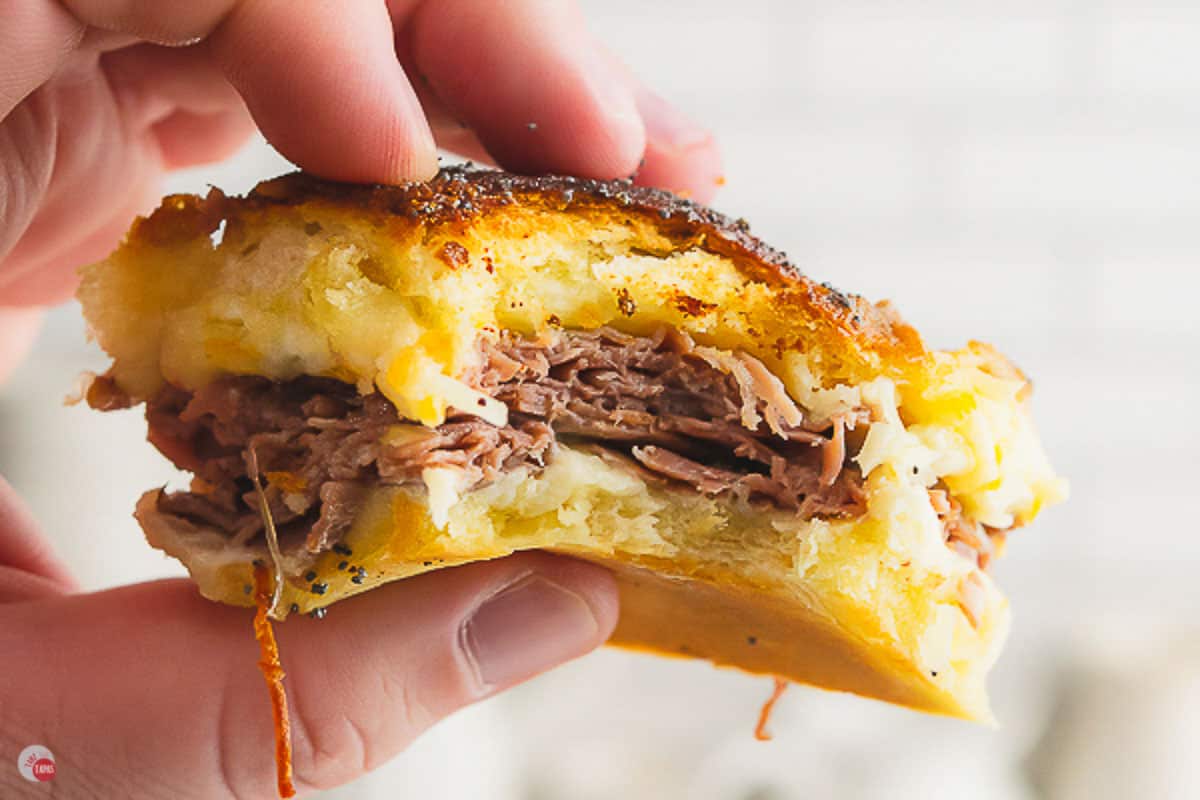
Second: Layer with roast beef and shredded cheese. Cover with top of bun.
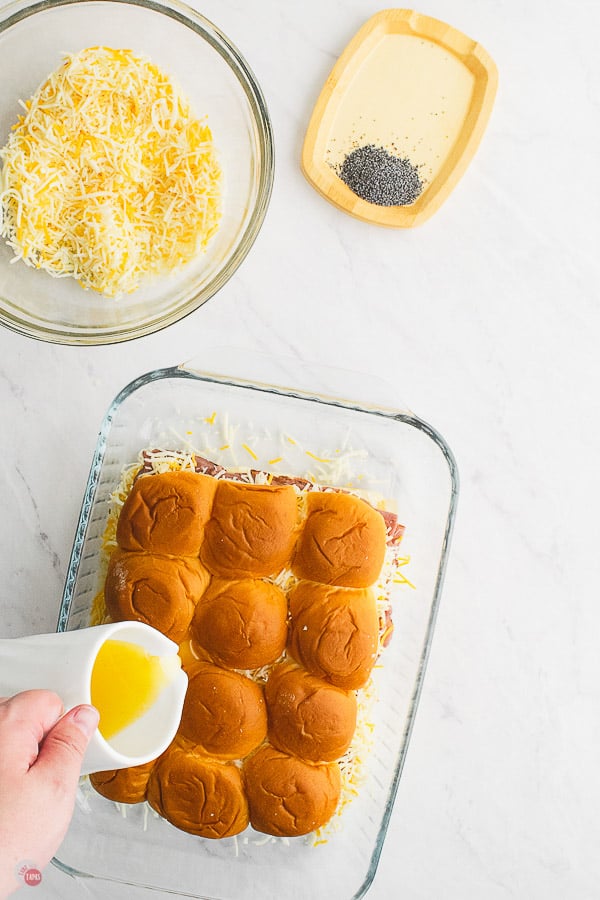
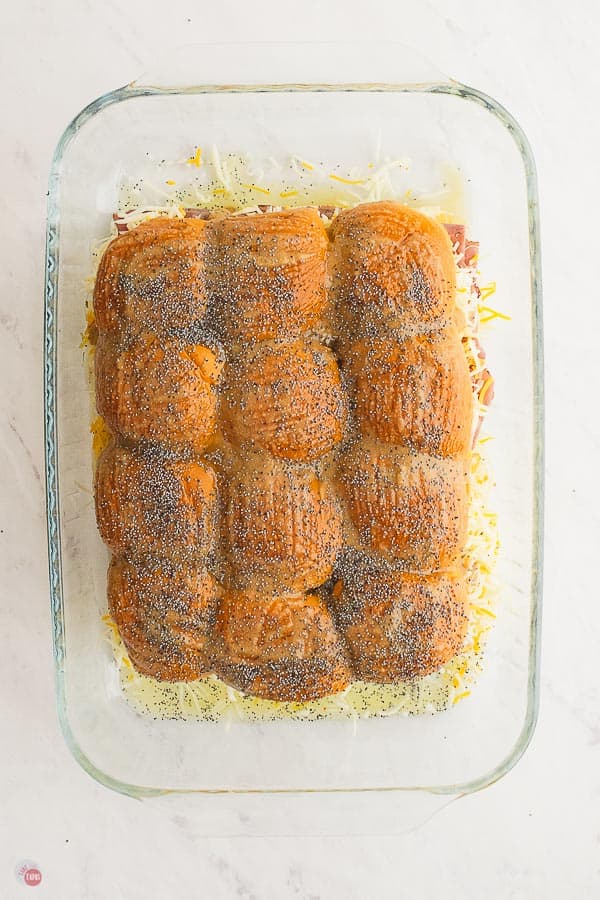
Third: Mix marinade and pour evenly or brush on the tops of the sandwiches. Sprinkle with poppy seeds. Cover with plastic wrap and let sit in the fridge for at least one hour up to overnight.
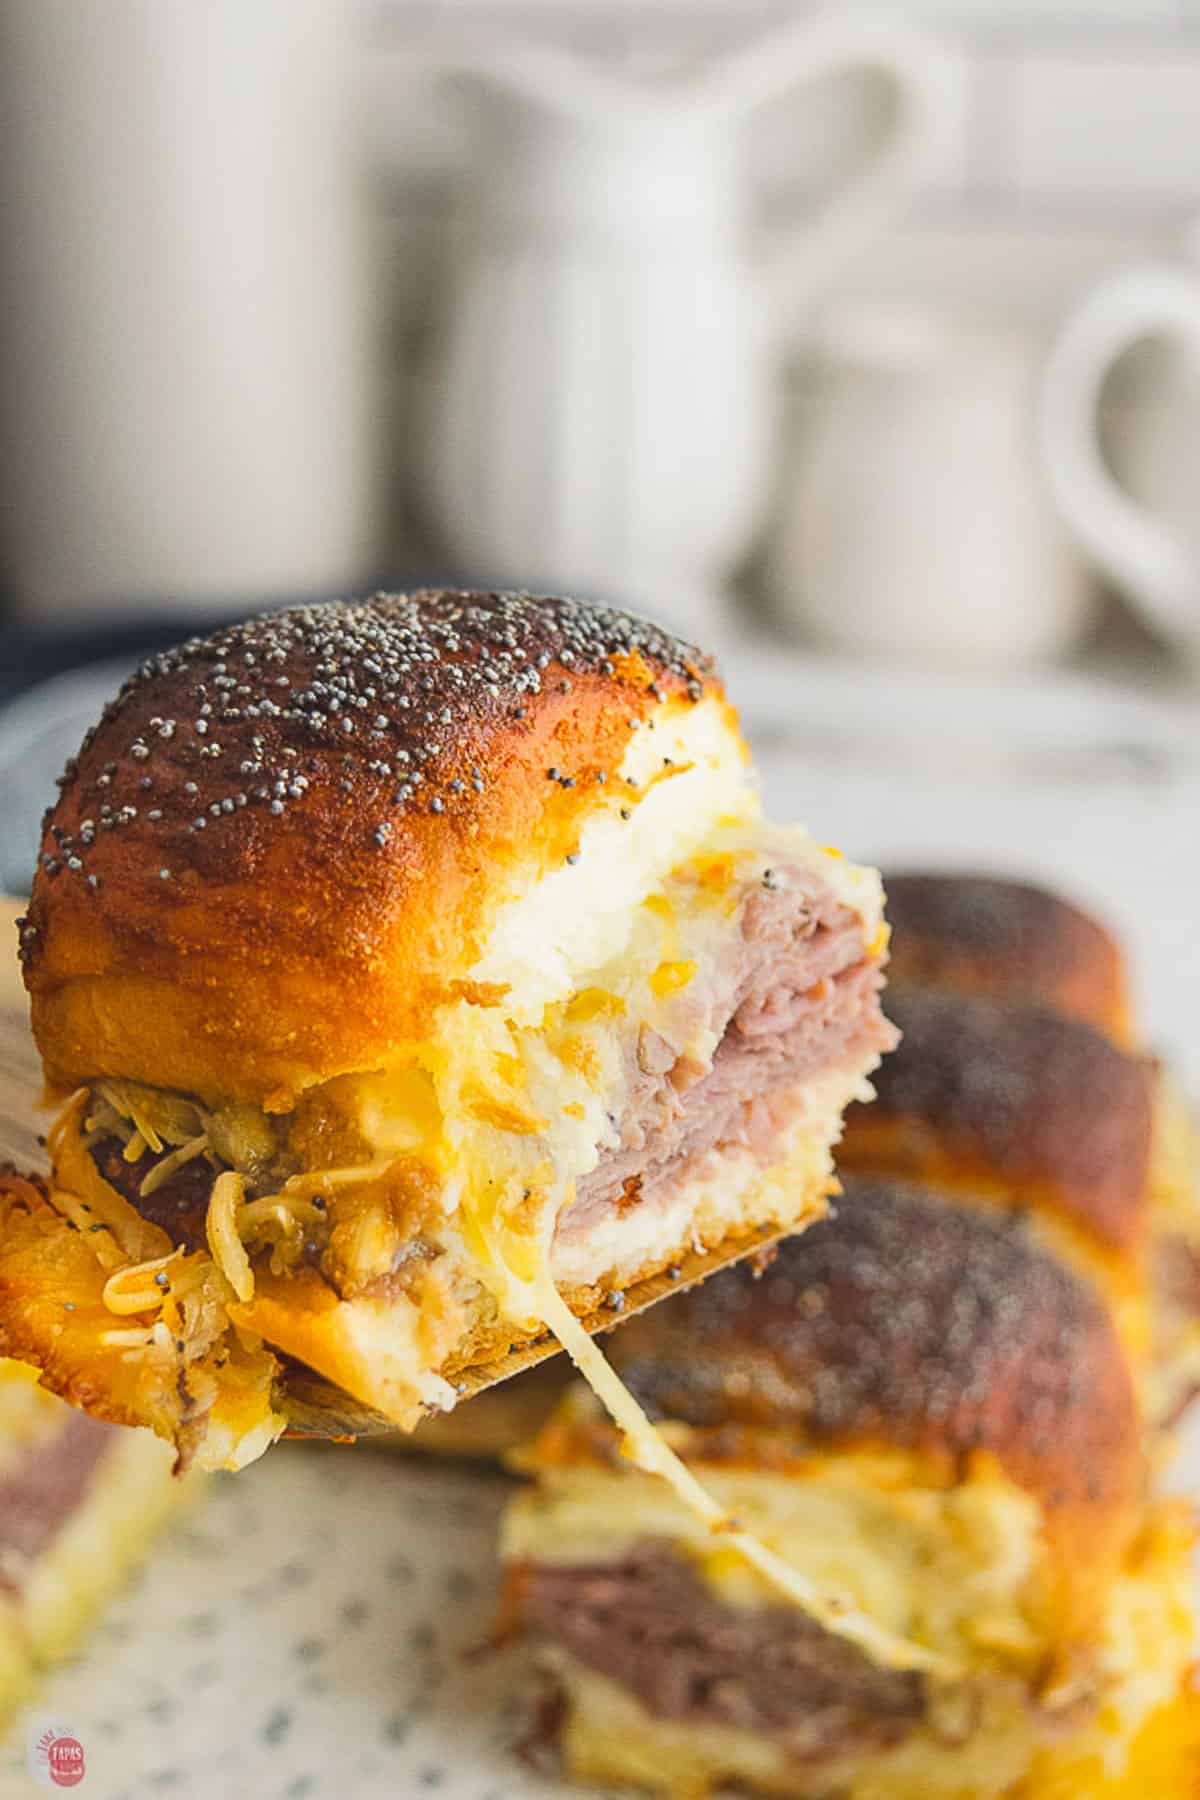
Fourth: When ready to bake, pop them in your preheated oven for 15-20 minutes or until the tops are golden brown and the cheese is nice and melty.
For the full recipe and detailed instructions, please refer to the recipe card at the bottom of the post.
How long do they last?
Store any leftovers in the fridge in an airtight container for up to 4 days. Reheat in the oven for best results!
How do I keep my sliders from getting soggy?
Believe it or not, warm sandwiches absorb the marinade and when they bake, the bottom of the rolls get a nice crispy from the fat in the butter mixture.
This roast beef sliders recipe, with gobs of melted cheese is simply to die for, and an elegant makeover of your standard ham and cheese variety.
Recipe Tips & Tricks
- Don’t use the hard rolls for the funeral sandwiches as they won’t absorb the marinade and end up too tough to eat after cooking.
- If you don’t like roast beef, you can use leftover ham!
- Let them sit for at least 1 hour to absorb the marinade. Overnight is best!
- I use horseradish sauce. Make your own by mixing prepared horseradish and some mayo.
- If you are not a fan of horseradish, try a Dijon mustard, yellow mustard, or whole grain mustard instead.
- I like Hawaiian rolls for this recipe but feel free to use your favorite buns. I like this homemade brioche bun too!
- Don’t like poppy seeds? Try sesame seeds instead!
- Separate the sliders with a serrated knife before baking to make it easier to pull apart after baking.
This Funeral Sandwich Recipe is perfect for feeding a large group of people be it friends or family members.
If you love this recipe as much as I do, please leave us a ⭐️⭐️⭐️⭐️⭐️ five-star review in the comment section below. Thanks!
Roast Beef Sliders – Funeral Sandwiches
Ingredients
Sliders
- 18 Sweet Dinner or Potato Rolls
- 36 thin slices of roast beef
- 8 ounces mozzarella cheese
- 8 ounces pepper jack cheese
- 8 ounces of Three Cheese Shredded Blend with Philadelphia Cream Cheese
Marinade
- 1 cup butter
- 4 tablespoons of Worchestershire Sauce
- 1 teaspoon garlic powder
- 2 teaspoons dried mustard
- 1 teaspoon onion powder
- 2 tablespoons poppy seeds
- 6 ounces horseradish sauce
Instructions
- Shred you two blocks of Kraft cheese.
- Cut your rolls in half and lay the bottoms in a 9X13 baking dish.
- Smear a tiny amount of horseradish sauce on each roll bottom.
- Add 2 slices of roast beef to each roll bottom.
- Cover the roast beef in the shredded cheese.
- Smear the remaining horseradish sauce on the inside of the roll tops.
- Place the roll tops on each slider.
- Mix your marinade together (minus the poppy seeds) and pour over all the sliders, covering each one as close to equal as you can get.
- Sprinkle with the poppy seeds.
- Cover and place in the refrigerator for at least 4 hours or overnight.
- When ready to cook, preheat oven to 350F.
- Bake rolls, uncovered for 15-20 minutes or until cheese is melted.
- Serve warm!
Notes
- Don’t use the hard rolls as they won’t absorb the marinade and end up too tough to eat after cooking.
- If you don’t like roast beef, you can use leftover ham!
- Let them sit for at least 1 hour to absorb the marinade. Overnight is best!
- I use horseradish sauce. Make your own by mixing prepared horseradish and some mayo.
- If you are not a fan of horseradish, try a Dijon mustard, yellow mustard, or whole grain mustard instead.
- I like Hawaiian rolls for this recipe but feel free to use your favorite buns. I like this homemade brioche bun too!
- Don’t like poppy seeds? Try sesame seeds instead!
- Separate the sliders with a serrated knife before baking to make it easier to pull apart after baking.
Nutrition
{Originally Posted 09/01/15 – Recipe, notes, photos updated 12/16/20}
©TakeTwoTapas.com. Content and photographs are copyright protected. Sharing of this recipe is both encouraged and appreciated. Copying and/or pasting full recipes to any social media is strictly prohibited.


Even though you often cannot find the Philadelphia cream cheese blend is still delicious with pretty much any cheese you use. Always party pleaser.
Agreed! I just name that one specifically because it’s extra creamy but any cheese will do. I find that Monterey Jack or mozzarella melt the best. Havarti is also a good choice:)
If you do make this to sit overnight, do you like the sandwiches come to room temp before baking or just straight out of the fridge?
I like to bring them to room temperature first so they bake evenly.
Hi, I’m making these for game day on Sunday, but am wondering about your last ingredient listed….8 ounces of Three Cheese Shredded Blend with Philadelphia Cream Cheese…wondering what exactly you mean by cheese with cream cheese. Can’t wait to try, I love these little sandwiches.
Sometimes you can find Kraft shredded cheese with cream cheese added to it. It’s called “creamy melt” Here is a link with a picture. https://amzn.to/3j8KqF1. If you can’t find it, I recommend getting a block of cheese and grating it yourself as it melts so much better. Hope you enjoy them!
Almost every comment are about something other than how they tasted. How did sandwich get over 4 stars?
You can leave a star review separate from commenting. Maybe those that have made them just left a star rating after they made them because they were busy eating them.
Easy & great
Do you separate the buns from each other before baking? Cut them apart when warm? Looks amazing!
I think they are easier to serve if they are separated before baking. You might have some melty cheese that makes a great pull when you grab one but you can always cut them beforehand and then after baking do it again. I hope you love them as much as I do!
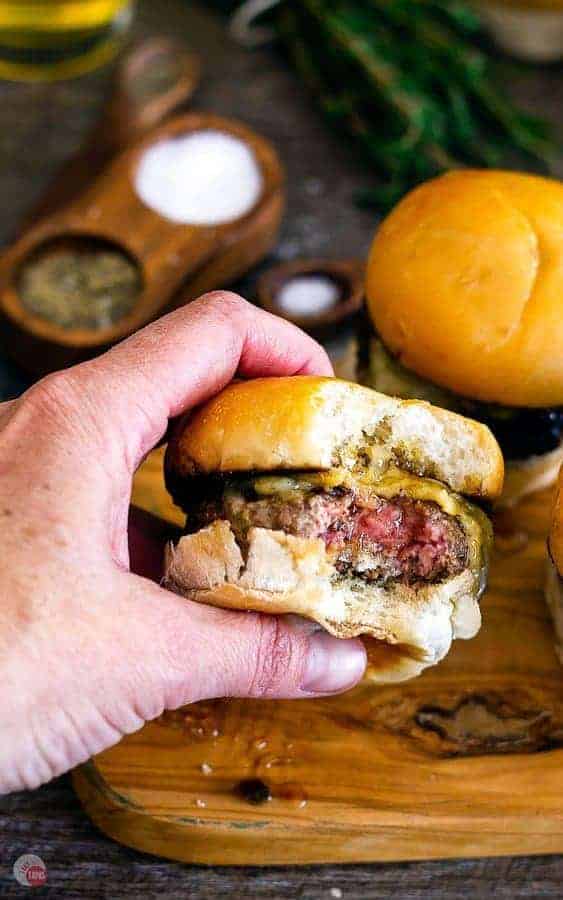
Aren’t these too messy to be hand-held? It looks like it is dripping off the fork? Sound delicious, however. Thanks.
also, how do 18 rolls end up making 24 sandwiches?
Sorry that was a typo when I switched recipe cards. It makes 18.
The cheese is stretchy but not “drippy” in the sense of watery. Feel free to use a fork and plate but I can place mine on a napkin and eat it in two or three bites before it gets all over me.
What is horseradish sauce. Is it different than jarred horseradish?
Thanks
It is different. It’s like a combo of prepared (jarred) horseradish and a mayo base. Here is a link to what it looks like https://amzn.to/36zFNr6 I found it in the deli section or where the other condiments are. It’s a game changer! If you can’t find it, just mix the jarred horseradish with mayo in a 1:1 ratio. Thanks!
oh em gee! looks at these and how tempting they are! I am trying to be healthier so I am reading this with the worst timing but be sure that i will still try this recipe out because they do look delicious!
Thanks!
oh em gee! looks at these and how tempting they are! I am trying to be healthier so I am reading this with the worst timing but be sure that i will still try this recipe out because they do look delicious!
These sliders definitely look like a celebration! I can’t wait to try these on Super Bowl Sunday!
Thank you so much. I know they will be a huge hit!
It is so funny how people remember certain food with the occasion that they ate it at. I like the celebration sliders much better, but the funeral slider would get many attention for sure. Make ahead recipes work so well for parties.
Funeral Sandwich haha, now that’s a good one! Well, whatever they are called, I think they make for a delicious, easy and quick pick-me-up or party food, any day of the week!
This is such a great idea – I’d never think of “marinating” a sandwich overnight in the fridge. But I guess baking it eliminates any potential sogginess. I love anything that can be prepped ahead of time for a big party!
me too! I was afraid that the bread would get soggy but they turn out great!
I’m suuuper nervous that the bottom buns are going to get really soggy! Can you reassure me that they turn out great!??! Lol I just don’t want to waste all of the ingredients!
I emailed you directly as I couldn’t respond via mobile. I have not had any problems with the bottom buns getting too soggy. They are a little moist but most of the marinade is absorbed on the top. Thanks so much for reading and I hope you enjoy them!
These pictures are making me hungry! Love anything smothered in cheese! And I agree that you must shred your own cheese. These would be great for a party or any family gathering!
You are right, these celebration sliders are excellent for any party. Best part is that you can fix everything early that removes the stress of hosting. I have weakness of pepper jack and cheddar cheese.
I love your new name and your take on these sliders! And thank you for including a coupon for the already Cheese! I’ll make sure to use it! And I’ll let you know when I make these! They’re going to be a hit in this house!
I like your name for these sandwiches much more. I always wondered why they were called such a sad name. But, whatever you call them, they look delicious. And I love that they are easy to make and can be made in advance!
They are going to be a celebration of life!
Those look sinfully delicious! I love cheese, probably just a little too much. 🙂 I’d love to make these, but they would need to be vegetarian – or just cheese! YUM!!
I think the cheese and horseradish would be a great combo! Maybe a slice of sweet potato or eggplant?
Ohh these slides look so delicious. So cheesy I love it! Perfect for big family dinners. Thanks for recipe. I’m pinning this and sharing!
You are speaking my food language – meat, spice & prepped before hand! I’m already loving the recipe. I’m so glad you changed the name as I love yours 🙂 It sounds like a perfect gameday nosh and the host can relax too.
This way you can celebrate the living and the dead!
It’s great you can make these ahead of time. Whenever I go to a party, I always feel rushed for time when I have to make something to bring!
Oh my goodness I cannot get enough of that stretchy cheese! And I agree, roast beef is the right choice for this. And horseradish?? Yum. (PS: Thanks for changing the name lol)
Love the sandwich and love the new name even more! There’s a few local recipes named “funeral” something or other and I always think “Why can’t we enjoy this food without somebody having to die!” Let’s eat good food every day!
Totally! Though most of the Baptist people I know love a good funeral because the food is going to be amazing LOL!
I am.. SO.. SO Glad that you didn’t decide to call these “Funeral Sliders” hahahaha… The hubs would adore these- he’s obsessed with horseradish!
All I can say is these are absolutely happening for the next football game. We love trying new versions of slider recipes and this one sounds amazing! I know everyone is going to agree!
Love this idea!! My heavens it would be great at any time you’re having a party. I love the idea of prepping ahead and just heating up before the event. Beef and horseradish were destined for each other. I can’t wait to make this.
You are so right! They were a match made in heaven!
I love sliders especially baked in the oven like this but I always keep them so simple. This one looks so fancy with horseradish and pepperjack cheese? now that’s a combo I must try. Btw You know before I read why she calls them funeral sandwiches i assumed it’s because its a funeral food, baked in one dish but serves many people. lol
I had the same notion and was initially turned off. Now that I make them they are definitely for the living!
Oh my…what a great idea. Perfect for feed a crowd. Easy to make…and I am sure they would disappear fast. Party perfect!!
Oh, you had me at horseradish! Plus they can be made ahead?? Sold!
That was what sold me too! Make ahead is a huge selling point for me!
I adore beef and horseradish together–these sound amazing!
Thank you Laura! I am not a huge fan of ham and cheese but I love roast beef and that spicy horseradish! I could put horseradish on anything!
These look so good. My family would LOVE these. Considered these pinned.
Thank you Michelle!
Oh, that stringy cheese shot tho <3 LOVE! This will be a perfect dish for our next house party!
Thanks Chrisy! I love that they are make ahead:)
I love the recipe, but even more how you changed the name of the sandwiches. Hard to imagine eating something that reminds me of a funeral, but I’d eagerly make a “celebration” recipe:)
I agree! I laughed when my mother in law told me they were called funeral sandwiches. I thought to myself “Who would name a food after such a sad event?” I am glad that you liked them!
These look fantastic! Perfect for Super Bowl!!
Thank you Katie! I love that you make them the night before and then just throw them in the oven!!
Oh, that stringy cheese shot tho <3 LOVE! This will be a perfect dish for our next house party!
Oh, that stringy cheese shot tho <3 LOVE! This will be a perfect dish for our next house party!
Yum! I may have to put these on our Super Bowl spread!
Thanks Carlee! I hope you like them!
I just clicked over from Foodgawker and am a little embarrassed that I missed these until now. So yummy J!!
No worries! So glad they made the front page! I am getting mad traffic from it today:) I made that pan, took the pics, and took them all the gym that night. No way was I keeping those in the house for temptation!
My sons would clean that pan out in a heartbeat!
Thanks so much for reading Sandra! My boys are the same way. My pan didn’t last long after I took the photos:)
I love how easy these sliders are to make ahead of a party! I haven’t tried shredding my own cheese, but for this recipe I’ll be sure to grab some Kraft chunk cheese and give it a try. YUM! ~client
sometimes the shredded is a tad dryer than the block and it seems to melt a little easier. But the shredded bag is usually the one I grab a handful out of and sprinkle in my mouth as I stand in front of the fridge!